
Getting started
Audience: Business administrators and permitted managers
Last reviewed: 2026-11-01
Quick Start: Your First Restroom
- Activate
- Create site
- Add restroom
- Add team
- Assign sign
- Record a check
- Activate: open your genuine setup invitation, choose your password and sign in.
- Create a site: open Business units, confirm the address and operating timezone, then save.
- Add a restroom: open Control Points, create the room under the right site, then use Set expected checks to configure its routine.
- Add the team: create or invite users, choose suitable roles and assign only their required sites.
- Assign the sign: scan the supplied unassigned sign with an authorised manager account and select the intended room. Install and test it with real phones.
- Prove the routine: carry out a real inspection, record the check and find the saved event in the manager view.
Activate your account
- Open the genuine account setup invitation requested for your business. Check the sender and the website address before entering a password.
- Follow the password setup link and create a unique password. Setup links are time-limited and single-use; an old link may no longer work after a replacement is issued.
- Open https://www.resteasy.ie/app/login.php and sign in using your own account details.
- Complete any required password change. If access is still pending, contact the person arranging your account rather than submitting another paid order.
Account setup depends on your arrangement with Rest Easy. Some applications need approval before access is available. Keep your account confirmation and wait for setup instructions rather than submitting another application.
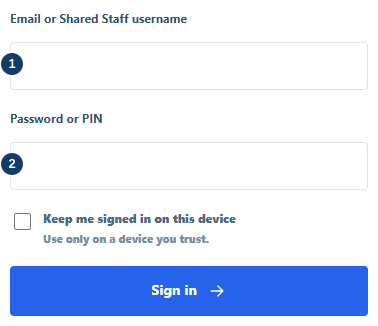
- Enter your own username or email.
- Enter your password, then sign in.
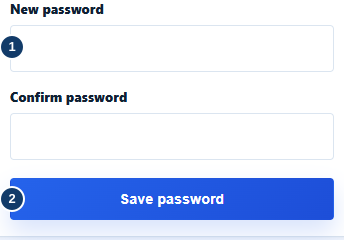
- Create and confirm your own password.
- Save your password, then sign in.
Set up a first location
- As a Head Office Administrator, open Business units and create or confirm the first site.
- Use an unambiguous site name, correct address and local timezone. Review the business classification; a unit normally inherits it unless overridden.
- Open Control points, create a restroom under that site and select the enabled Restroom type.
- Set the expected-check schedule to match the real operating routine. A location without a schedule is unconfigured, not automatically compliant.
- Add the team and give each person access only to the sites they need.
- Assign and install the correct physical sign, then test both the staff and customer journeys.
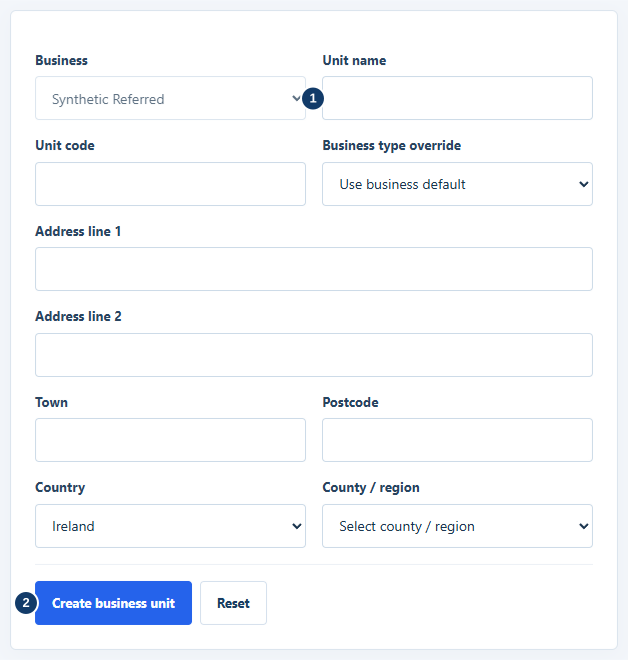
- Enter the site name and required details.
- Create the business unit and check the saved list.
Confirm that setup works
Record a real inspection. Confirm Check recorded, the room, time and staff member, then find the event in the manager view. Where issue reporting is enabled, complete a clearly labelled training report and resolve it after the test.
Before opening to customers, confirm a named manager knows how to respond if either the sign or notifications fail. Your physical safety procedure must continue when the application is unavailable.